HTML,CSS,JS(자바스크립트)로 웹 그림판 만들기 3
드디어 3편입니다. 끝이 보입니다. 4편이 마지막입니다^^
3편까지 대부분의 기능이 만들어집니다.
4편에서는 마지막으로 저장기능을 구현하고 웹그림판 만드는 과정을 정리하는 시간입니다.
2편까지 완료하면 절반이지만, 그래도 벌써 시각적으로는 훌륭한 그림판이 만들어졌습니다.
오늘은 기능을 하나하나 추가해볼게요.
1️⃣ 색 바꾸기 (컬러 변환) 기능
index.html>body구간에서
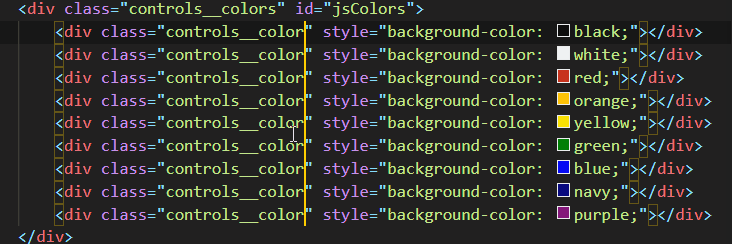
여기 컬러부분있죠? 저렇게 다중 선택을 해서 위와 같이 컬러 클래스코드를 작성해줍니다.
(VScode에서 단축키 : Ctrl+Alt+🔼방향키 / Alt+마우스 다중 클릭)
다음, app.js로 이동해서
const 추가해줍니다.
const colors = document.getElementsByClassName("jsColor");그리고 하단에도 아래와 같이 추가해줍니다. (클릭하면 각각의 컬러가 이벤트되도록)
function handleColorClick(event) {
  const color = event.target.style.backgroundColor;
  ctx.strokeStyle = color;
}
Array.from(colors).forEach(color =>
color.addEventListener("click", handleColorClick));그리고, onMouseMove를 사용할거라 MouseDown부분은 삭제해줍니다.
#000000(블랙)으로 설정되어있는 부분!
그 부분은 제가 기본값을 검정으로 설정해놓은거에요.
지금 그림판에서 그림을 그리면 검정색으로 그려지잖아요?
위 변경된 구간들이 색을 다양하게 변경될 수 있도록 하는 거에요.
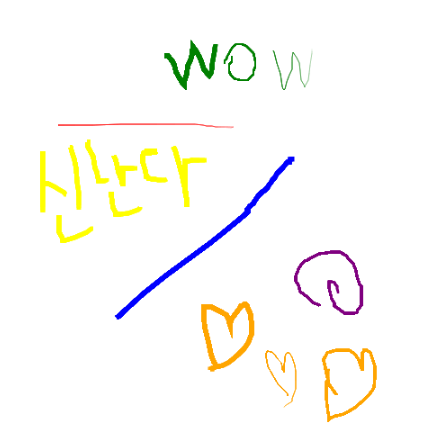
여기까지 하셨으면 클릭할 때마다 컬러가 변경되는 이벤트가 샐행되겠죠~
확인해볼까요!?
TA-DA! 색상이 변경되는 마법!
색상 변경 이벤트 정리시간
1. ctx.strokeStyle
2. color를 target으로 받아서 넣기
/* 이 부분 삭제*/ function onMouseDown(event) { painting = true; /*이 부분 추가*/ function handleColorClick(event) { const color = event.target.style.backgroundColor; ctx.strokeStyle = color;
3. Array만들고 forEach로 모든 컬러들을 addEventListner~~~~()); 로 호출하기Array.from(colors).forEach(color => color.addEventListener("click", handleColorClick));
2️⃣ 브러쉬 사이즈 변경하기
app.js에서 const colors, const range 해줍니다.
const range = document.getElementById("jsRange");기능도 넣어줘야죠.
function handleRangeChange(event) {
const size = event.target.value;
ctx.lineWidth = size;
}
이런 식으로 브러쉬 굵기가 바뀌는 것을 구현해봤습니다.
3️⃣ 채우기 기능
채우기 기능은 말 그대로 페인트 툴!
클릭하면 그 공간에 배경색이 입혀지는 기능을 넣어볼게요.
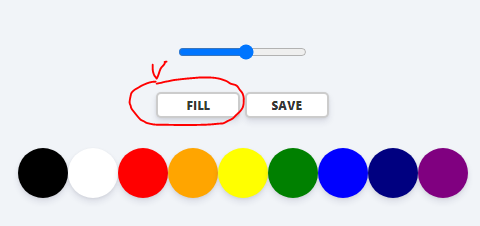
체크한 FILL 부분이 PAINT 기능까지 사용할 수 있는 버튼으로 만들어볼거에요.
그래서 두 가지 기능을 바꾸어가며 쓸 수 있도록요.
버튼이 있는 index.html로 이동합니다.
<button id="jsMode">Fill</button>버튼 id 확인 완.
app.js로 이동해서 코드 작성해줍니다.
const mode = document.getElementById("jsMode");선언해주고~ 아래에 기능 적어줘야겠죠
if (mode) {
mode.addEventListener("click", handleModeClick);
}자 다음은
let painting = false;
let filling = false;let painting 아래에 filling도 나란히 만들어줍니다. 디폴트 값은 마찬가지로 false이죠.
그 다음은 funcion 작성할 순서!
function handleModeClick() {
if (filling === true) {
filling = false;
mode.innerText = "Fill";
} else {
filling = true;
mode.innerText = "Paint";
}
}루틴이 좀 익숙해지고 있습니다...
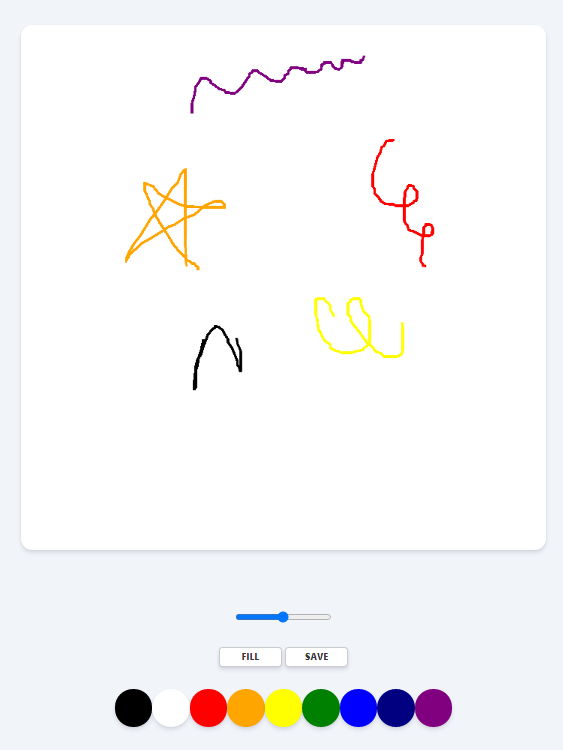
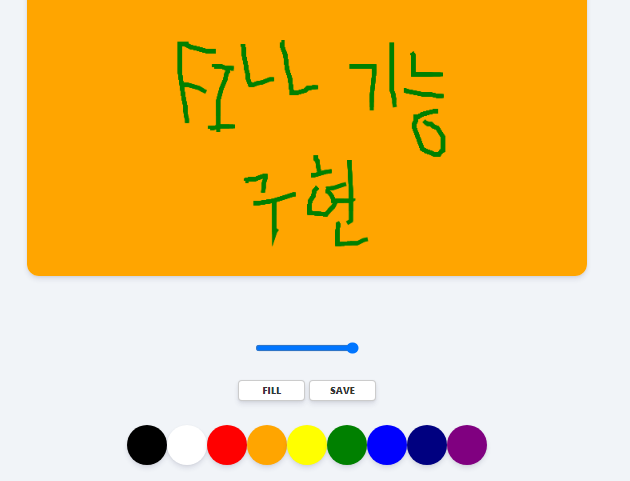
자, 저장하고 페이지 실행해볼까요?

이런 식으로 버튼이 변경되는 것을 확인할 수 있습니다.
기능구현 할 차례~
MDN에서 fillRect에 대해 살펴봅니다.
https://developer.mozilla.org/en-US/docs/Web/API/CanvasRenderingContext2D/fillRect
The fillRect() method draws a filled rectangle whose starting point is at (x, y) and whose size is specified by width and height. The fill style is determined by the current fillStyle attribute.
>>>
시작점이 (x, y)이고 크기가 너비 및 높이로 지정된 채워진 사각형을 그립니다. 채우기 스타일은 현재 fillStyle 특성에 의해 결정됩니다.
다음으로 MDN에서 fillStyle에 대해 살펴봅니다.
https://developer.mozilla.org/en-US/docs/Web/API/CanvasRenderingContext2D/fillStyle
The CanvasRenderingContext2D.fillStyle property of the Canvas 2D API specifies the color, gradient, or pattern to use inside shapes. The default style is #000 (black).
번역>>>
Canvas 2D API의 CanvasRenderingContext2D.fillStyle 특성은 내부 쉐이프를 사용할 색상, 그라데이션 또는 패턴을 지정합니다. 기본 스타일은 #000(검은색)입니다.
자, 위의 설명을 참고해서 코딩해봅니다.
app.js에서 초기화해주면서 strokeStyle과 fillStyle을 넣어주고 const INITIAL_COLOR값으로 맞춰줍니다.
그 다음 canvas클릭킹 기능 구현하고 (click, handleCanvasClick)
캔버스 사이즈만큼 전체 채우기 기능을 구현해줍니다. (fillRect, CanvasSize)
다 됐으면 Paint 기능에서 Fill 기능이 되었을 때 채우도록 합니다.
코드는 더보기에서 확인하세요~
const canvas = document.getElementById("jsCanvas");
const ctx = canvas.getContext("2d");
const colors = document.getElementsByClassName("jsColor");
const range = document.getElementById("jsRange");
const mode = document.getElementById("jsMode");
const INITIAL_COLOR = "#000000";
const CANVAS_SIZE = 700;
ctx.strokeStyle = "#2c2c2c";
canvas.width = CANVAS_SIZE;
canvas.height = CANVAS_SIZE;
ctx.strokeStyle = INITIAL_COLOR;
ctx.fillStyle = INITIAL_COLOR;
ctx.lineWidth = 2.5; /* 라인 굵기 */
let painting = false;
let filling = false;
function stopPainting() {
painting = false;
}
function startPainting() {
painting = true;
}
function onMouseMove(event) {
const x = event.offsetX;
const y = event.offsetY;
if (!painting) {
ctx.beginPath();
ctx.moveTo(x, y);
} else{
ctx.lineTo(x, y);
ctx.stroke();
}
}
function handleColorClick(event) {
const color = event.target.style.backgroundColor;
ctx.strokeStyle = color;
ctx.fillStyle = color;
}
function handleRangeChange(event) {
const size = event.target.value;
ctx.lineWidth = size;
}
function handleModeClick() {
if (filling === true) {
filling = false;
mode.innerText = "Fill";
} else {
filling = true;
mode.innerText = "Paint";
}
}
function handleCanvasClick() {
if (filling) {
ctx.fillRect(0, 0, CANVAS_SIZE, CANVAS_SIZE);
}
}
if (canvas) {
canvas.addEventListener("mousemove", onMouseMove);
canvas.addEventListener("mousedown", startPainting);
canvas.addEventListener("mouseup", stopPainting);
canvas.addEventListener("mouseleave", stopPainting);
canvas.addEventListener("click", handleCanvasClick);
}
Array.from(colors).forEach(color =>
    color.addEventListener("click", handleColorClick));
if (range) {
range.addEventListener("input", handleRangeChange);
}
if (mode) {
    mode.addEventListener("click", handleModeClick);
}
오늘은 여기까지~
다음 포스팅 4편은 마지막 완성편입니다!
다음 강의에서는 저장기능을 마지막으로 해볼게요
그럼 안녕~

사용한 프로그램(소스코드 편집기): Visual Studio Code (a.k.a VScode)

(위 참고의 노마트코더를 보고 만들었습니다. 영상으로 잘 나와있으니 보시는걸 추천합니다.)